
This post contains affiliate links. As an Amazon Associate I earn from qualifying purchases.
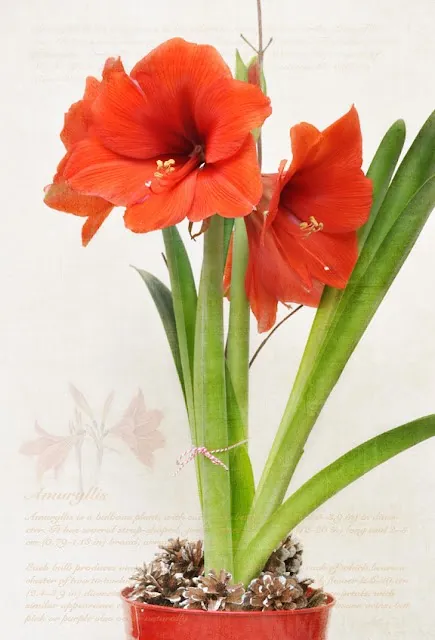
To grow amaryllis bulbs indoors, plant a firm, unwaxed bulb in a draining pot only 1–2 inches wider than the bulb, leaving its upper half above the potting mix. Start it warm, then move new growth into a sunny window and expect flowers in roughly six to eight weeks—not on a guaranteed holiday date. This method is for a normal rooted bulb in potting mix, rather than a waxed novelty bulb or a decorative water arrangement.
Quick answer: Pot: 1–2 in. wider than the bulb, with drainage.
Planting depth: Upper half of bulb exposed; mix about 1 in. below rim.
Starting temperature: 70–75°F (21–24°C); sunny window once growth appears.
Water: Water after planting, then let mix dry somewhat; never keep it soggy.
Flowers: Usually about 6–8 weeks after potting; cooler 65–70°F (18–21°C) conditions can extend the display.
Start with the Right Kind of Bulb
Holiday “amaryllis” are usually Hippeastrum hybrids. Buy a firm bulb from a reputable nursery and keep its name and instructions if supplied; individual varieties and pre-growing treatment affect timing. A bulb already producing a flower stalk will not follow the same timetable as one just beginning growth.
Pet caution: Treat amaryllis as toxic to cats and dogs, with particular care around bulbs and loose plant pieces. Keep the plant, packaging, and trimmings inaccessible to pets. If ingestion occurs, contact a veterinarian promptly rather than waiting to see whether symptoms develop.
What You’ll Need
- A similar terracotta pot with a drainage hole — measure your bulb before choosing a nominal 6-inch pot; clay is one option, not a requirement.
- Well-draining container potting mix — use a suitable fresh mix rather than compact garden soil.
- A hand trowel — helpful for adding small amounts of mix around the bulb without burying its neck.
- Small clean snips — useful for faded individual flowers; use suitable sharp pruners or a knife for a thick spent stalk.
- A saucer, water, and a sturdy plant stake with soft ties — for drainage management and support if a flower stalk leans.
Supplies for Planting and Aftercare
The pot, mix, trowel, and snips support the soil-grown method below. Choose the pot to fit the bulb and keep a separate sturdy support available if needed; these supplies are not the exact items in the creator photographs.

- Premium Quality: These terra cotta pots are constructed of high-quality clay, which allows more water and air to circulate freely within the pots while yet maintaining their structural integrity. It's an excellent choice for cactus, succulents, and other plants that thrive in dry soil, and it's also appropriate for areas with lower temperatures. The high air permeability of the pot walls helps the soil to dry out more quickly
- Safe Packaged: Orceler clay pots are fired at a temperature of 1922℉, deliver superior breathability, durability, and crack resistance. All packages have undergone a drop test from a height of 3 feet to ensure they will remain intact during delivery
- Tiny and Cute: The terracotta pots have a height of 5.3 inches and a width of 6 inches, while the attached saucers measure 0.98 inches in height and 4.6 inches in diameter. They are specifically intended for growing succulents, cactus and herbs. Plants and soil are not included in our 4pcs plant pots set
- Drainage Hole & Saucer: A small hole on the bottom of each flower pot enables water to drain and ventilate the soil. This helps avoid root rot, which may be caused by overwatering. The saucer serves to collect any extra water and maintain a clean environment around it
- Ideal for Indoor & Outdoor Usage: The cute clay pots for plants are perfect for plants nursing, ornament for balcony or room, wedding, baby shower, and other party decoration, crafts creation and more. Suitable for school projects of teaching children about growing plants

- GARDENING ESSENTIAL: With these stainless steel blade gardening shears, pruning tasks like cutting flower stems or maintaining your herb garden are easier with fast and clean cuts
- MAXIMUM POWER AND PRECISION: Micro-tip blades on these garden clippers (handheld) cut all the way to the tip for clean, healthy cuts making these great plant pruning shears
- LONG-LASTING AND RELIABLE: Stainless steel blades stay sharp through heavy use and provide excellent durability for lasting value; Fiskars garden pruners and tools are built to last
- QUALITY GARDEN TOOLS: Designed to help you cultivate a better garden, Fiskars hand pruners are equipped with smart technologies and award-winning, ergonomic features that make it easier and more enjoyable to transform your outdoor space
- INCLUDES: (1) Pair of 6" Fiskars Micro-Tip Pruning Shears with Sheath; Lifetime Warranty


- FOR USE ON: Not just an indoor potting soil, this can also be used as a potting soil for outdoor plants and is a great soil mix for vegetables, herbs & all other container plants & flowers.
- CONTAINS: This organic soil for plants & vegetables is a rich blend of sphagnum peat moss, humus & perlite enriched with earthworm castings, alfalfa meal, kelp meal & feather meal
- MYCO-TONE: A proprietary blend of endo & ecto mycorrhizae.
- WHEN TO USE: Any time planting containers, whether starting a new plant or transplanting into a larger container. Plants require regular re-potting and fresh planting soil for optimum growth.
- ORGANIC GARDENING: Contains a rich blend of only the finest natural ingredients. No synthetic plant foods or chemicals are used.

- Thickened Aluminum Alloy Material: Our gardening shovel is made of high-quality aluminum alloy material, allowing the garden trowel to dig deeply into the soil and cut through hard turf easily. The 0.08 inch thickness makes our spade shovel more sturdy and long lasting, ensures durability and stability during use, and makes the trowel not easy to break and long lasting
- Ergonomic Design: The trowel garden tool is designed with an ergonomic rubber-grip handle that reduces hand and wrist fatigue while digging. The high-quality non-slip TPR material of the handle makes the trowel garden tool easy to hold and comfortable to use. Saving your labor, time and energy
- Easy to Store: The small hand trowel is lightweight and compact, makes it easy to store on your garden bag and carry out for gardening. The hanging hole in the handle is designed to accommodate a rope. You can hang the hand shovel for gardening on everywhere you want when you need to do gardening works in your own garden or other places
- Easy to clean: Our hand trowel has a smooth surface, with a polished aluminum knife head that is rustproof and long lasting. The small garden shovel is also easy to clean after use, ensuring its smooth appearance and remaining rust resistant for an extended period of time
- Multi-function: This small shovel is suitable for a wide range of horticultural tasks, including digging, weeding, loosening soil, aerating, transplanting, etc. The great gardening tools for women, small shovels for gardening, digging shovel, small plant tools
Plant and Grow the Bulb in Seven Steps
Step 1: Inspect the bulb before planting
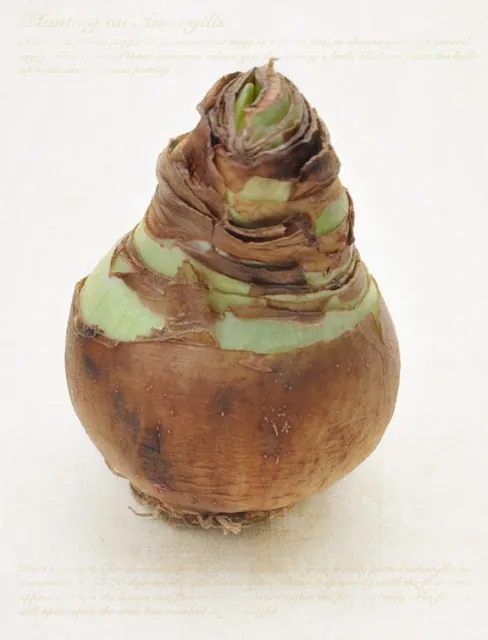
Choose a firm bulb without soft, decaying areas, and handle any attached roots gently. Keep a short emerging shoot intact rather than trimming it to make planting easier. The photograph shows the starting material clearly: a bulb and new shoot, not a finished flowering plant. If the bulb arrives damaged or rotting, ask the supplier about it before committing it to a fresh pot.
Step 2: Choose a snug pot with drainage
Measure the bulb across its widest point and select a pot approximately 1–2 inches wider in overall diameter, as Iowa State Extension recommends. That is the total extra width, not an extra two inches on every side. The container may be clay, ceramic, or plastic, but it needs drainage holes. Set it on a saucer you can empty rather than inside an outer container that hides standing water.
Step 3: Leave the upper half of the bulb exposed
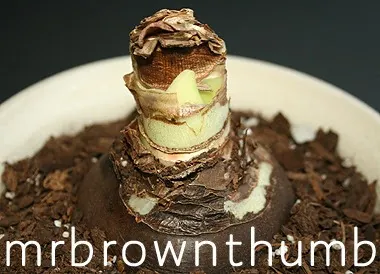
Put a little mix in the bottom, center the bulb, and add mix around the roots and lower part of the bulb. Firm it gently enough to hold the bulb upright without crushing roots. Follow Iowa State’s planting method: leave the upper half above the surface and about one inch between the mix and the rim. Do not bury it like an outdoor daffodil bulb.
Step 4: Water once, then start it warm
Water the newly potted bulb well and allow excess water to drain. Place it in a warm position around 70–75°F (21–24°C), not directly on a radiator or heat vent. After that first watering, let the mix dry somewhat before watering again. Check the root zone rather than keeping the pot constantly wet while waiting for a visible change; warmth and patience are more useful than repeated extra watering.
Step 5: Give new growth a sunny position
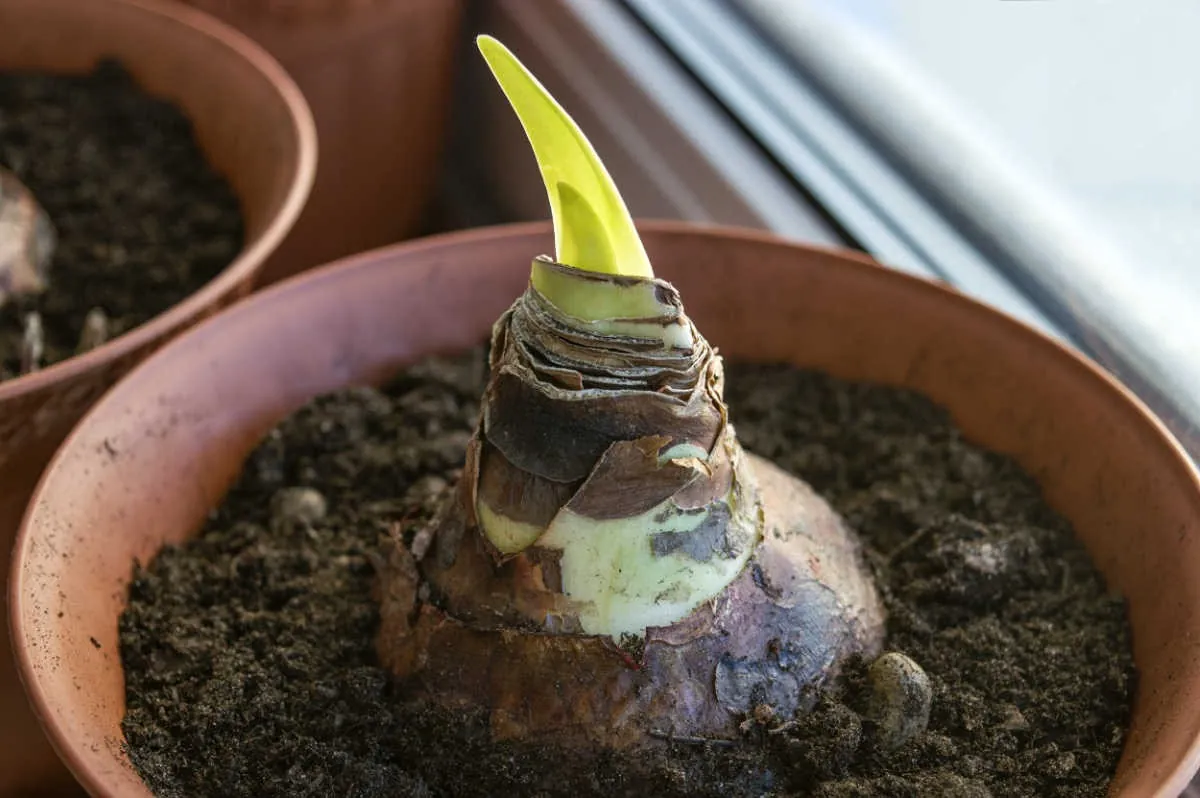
When growth appears, move the pot to a sunny window where the leaves and stalk can develop without touching cold glass. Turn the pot each day while the flower stalk elongates to encourage straighter growth. Add a sturdy stake if the stalk begins leaning badly, taking care not to pierce the bulb. If you feed during active growth, follow the fertilizer label rather than improvising a stronger mixture.
Step 6: Enjoy the flowers in a slightly cooler spot
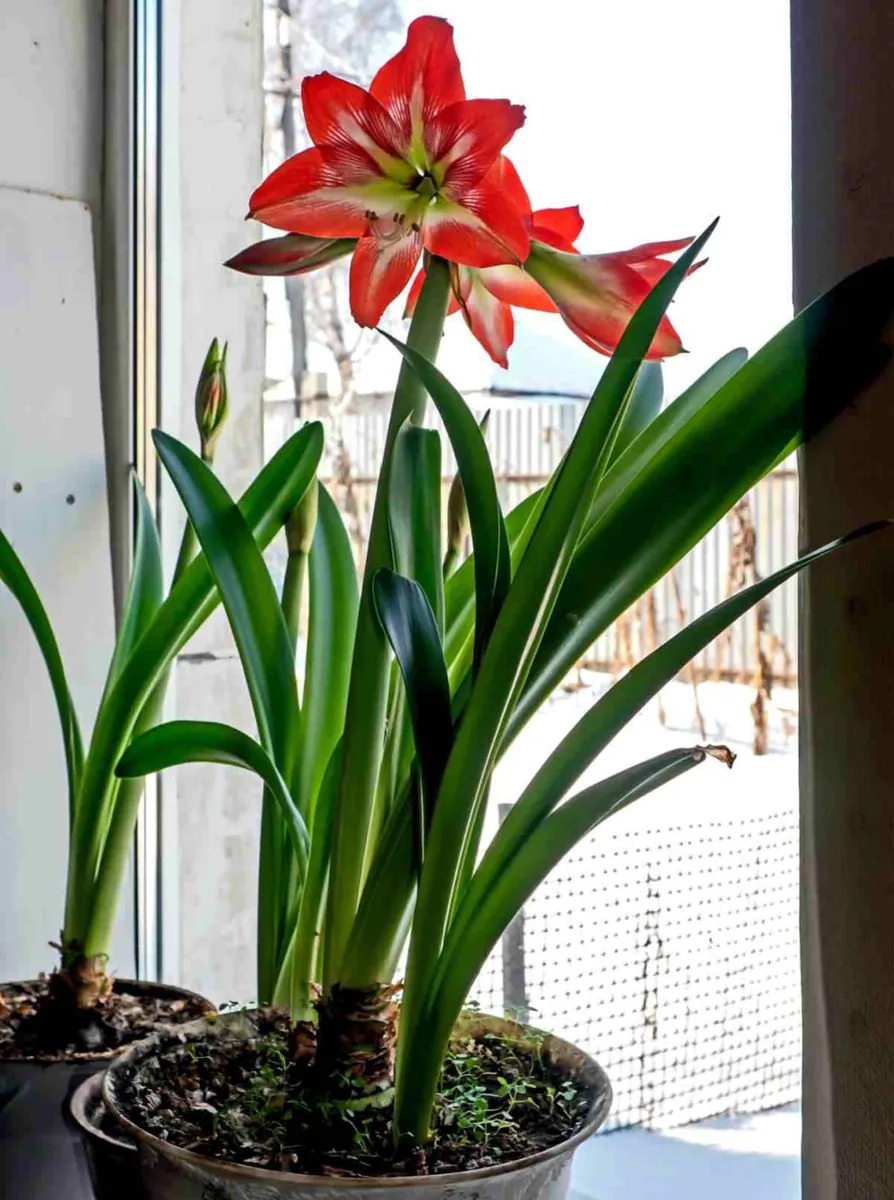
Flowering often begins about six to eight weeks after potting, but the bulb, variety, and growing conditions can shift that window. Once flowers open, Iowa State suggests a slightly cooler position around 65–70°F (18–21°C), out of direct sun, to prolong the display. Keep the pot stable and the stalk supported as needed. Remove individual faded flowers carefully without cutting healthy leaves or a stem that still has developing buds.
Step 7: Keep the leaves growing after bloom
After the entire flower stalk is spent, cut it about 1–2 inches above the bulb with a suitable sharp tool. Leave healthy strap-like foliage in place: it helps replenish the bulb’s reserves. Move the plant back to a sunny growing position and water when the soil surface is nearly dry. The next job is growing a healthy bulb, not immediately forcing it into a dark cupboard for another flower cycle.
A Simple Indoor Growing Timeline
| Stage | What to do | What not to assume |
|---|---|---|
| Just potted | Warm 70–75°F; let mix dry somewhat after first watering | More water will make a dormant bulb hurry |
| Shoot and stalk growing | Sunny window; rotate daily; support a leaning stalk | Every bulb follows the same growth order |
| Open flowers | About 65–70°F, away from direct sun | A purchase date guarantees a Christmas bloom |
| After flowering | Keep healthy leaves growing in good light | The bulb needs immediate dormancy |
Troubleshooting Without Overcorrecting
- Mix stays wet → Check the drainage hole and empty the saucer. Reduce watering until the mix has dried somewhat; do not add more because a shoot has not appeared.
- Stalk leans toward the window → Turn the pot daily during elongation and add a sturdy support if needed. Do not force a bending stem upright with a tight tie.
- Flowers fade faster in a hot room → Move the flowering pot to the cooler range above, away from direct sun and heating vents.
- Bulb feels soft or develops decay → Stop treating it as a simple thirst problem. Isolate it from other plants and ask the supplier or local Extension service about the condition; do not cover a rotting area with more mix.
FAQ
Can an amaryllis bulb flower again next year?
Yes, but reblooming depends on replenishing the bulb during its leafy growing phase. Iowa State’s after-flowering guidance describes a later fall rest with cool conditions around 50–55°F (10–13°C) for at least eight to ten weeks before restarting growth. That is a later-season plan, not an instruction to remove healthy leaves as soon as this winter’s flowers fade.
Can the pot go outdoors after winter?
It can spend the growing season outside when local frost risk has passed and conditions are suitable. Acclimate it gradually rather than moving leaves straight from a window into strong sun; Iowa State describes roughly seven to ten days of hardening off. Its calendar dates are regional examples, so use your own weather and bring the plant back into appropriate indoor conditions before cold threatens.
Do these instructions work for a waxed amaryllis bulb?
Not as written. A waxed novelty bulb may be sold without a usable root system or an ordinary draining pot, so it is a different growing product. Follow the grower’s directions and do not promise normal long-term aftercare or reblooming from an unidentified waxed bulb. For this method, start with an unwaxed bulb intended for planting and keep its original growing label.
Start with a sound bulb, a snug draining pot, and measured watering, then let the growth set the pace. Keeping the leaves healthy after flowering gives the plant a better chance of becoming more than a one-season display.
Giving one as a present? See more of the best Christmas plants to grow and give, or keep your indoor garden going with these low-light indoor plants for winter.
Featured photo: 📷 Jennifer at Three Dogs in a Garden.